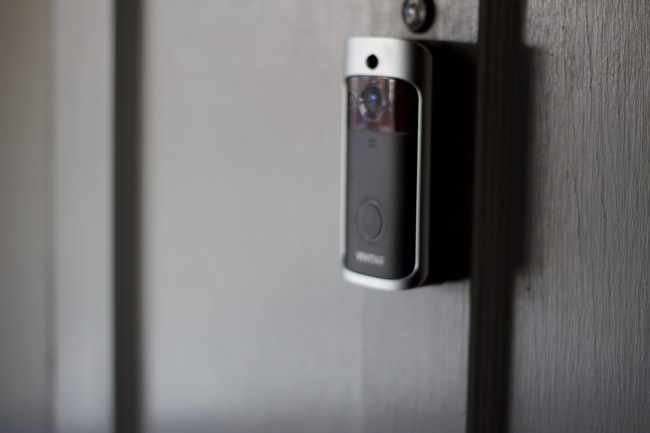
Becoming a parent has made me paranoid, and becoming a homeowner has made me more paranoid about our surrounding. When we lived in our apartment, my logic always revolved around the fact that we lived on the top floor. It was a false sense of safety, but somehow it made me feel better. Since moving into our house, I’ve searched high and low to find ways to keep us safe and protected. I wanted to have a way to keep an eye on our home, whether we are at home or whether we are away. We have security cameras and other smart technology items in our home but I still wanted to add a doorbell.

When I found out about Vivitar’s Wireless Video Doorbell, I knew I wanted to give it a try. The company was gracious enough to send me one of the doorbells to review. It arrived quickly and I was ready to start.
Inside your box, you will find the doorbell camera, two rechargeable batteries, mount, and screws. There is a slot for a storage card for recording HD video of visitors, however, it’s not included in the box. You can either choose the purchase the SD card for storing video or setting up cloud video storage.

About Vivitar Wireless Smart Video Doorbell
Know who is at your door at all times with Vivitar Wireless Video Doorbell. The Vivitar Wireless Video Doorbell comes equipped two-way intercom (speak and listen) for ultimate home protection. Full HD 1080p resolution provides a crisp and clear image of the surroundings whether day time or night time. Easily connects to your smartphone or tablet. Compatible with Alexa.

Getting started with your smart doorbell is easy. Start by charging the camera, so the battery is fully charged. Once it’s charged download the Vivitar App on your iOS or Andriod device. Open the app and follow the steps to get your doorbell connected to the app and the internet. It took me a few tries when I started at first, but I was able to get my doorbell up and functioning within ten to fifteen minutes.


Using the app it’s self is a breeze, when I have a visitor at the door, I get a notification on my phone that someone is at the door. I can simply open the app to see who’s at the door. If I wanted to snap a photo of them I can, I can record video, and I can even chat with them. Check out this quick clip I shared of the doorbell in use. I’m sharing from recording what’s happening on my phone.
I have to say the video quality on the app is really good as long as my internet is playing nice. My doorbell is behind my screen door and on our main door to enter our house. It picks us up every time we leave and enter the house. I wanted to have the doorbell to pick up faces of visitors on our porch. It detects motion at soon as the person is on the porch. If the doorbell is rang, it send me the notification, if I don’t answer it shows up as a missed call. All of these are recorded and stored on my device.

The Vivitar Wireless Video Doorbell picks up motion within about 3 to five seconds of the person arriving on the porch, sometimes quicker. That’s

The doorbell is light weight and easy to manage. I was able to get about 30 days of use on one battery charge. I’m sure it lasts longer if it’s in an area with less motion of if you change the settings on your app.
With any new device there are kinks, and I hit a few snags with the doorbell. The app was a little challenging at first. I consider myself very tech savvy and I had to try a few times to set it up. It also lacks the ability to add another user on the the same device. My security cameras lets me add multiple users, so both my husband and I are set up on that app. I was hoping to get him added in the doorbell app, but we can’t found a way to share privileges with him. Hopefully with updates the app with improve and become more user friendly with extra functions.
You can purchase the Vivitar Wireless Video Doorbell in stores and online from your favorite retailers. The price is around $119.99, and at that price it’s a great option for anyone looking for some extra security or someone looking to keep an eye on their home.


